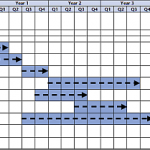
You can use a 6-step approach presented in this Project Activity Schedule Template to develop a detailed activity schedule for your project. The steps are as follows:
Step 1. List Main Activities
The very first step is to identify what needs to be done within your project for producing a desired outcome. The step requires you to conduct an analysis of project objectives to determine what the project must do in order to deliver the expected results. It also involves reviewing assumptions, which are external factors that have an identifiable impact on the success of the project, but which are out of the direct control of the management team.
The simplest way to identify main activities is to explore the objective hierarchy of your project. The objective hierarchy of a typical project consists of the following 4 components:
- Objectives
- Purpose
- Results
- Activities
The components are linked to each other by assumptions, which can be either true or false. In other words, once activities have been carried out and their related assumptions hold true, results can be achieved. Once the results and their assumptions have been fulfilled, the purpose can be accomplished; and so on. In case assumptions at any level hold false, the next component fails to be delivered.
Use this checklist for identifying the main activities of your project:
- Review the objectives of your project to understand what outcome is expected upon project completion
- Determine the objective hierarchy along with its components, including Objectives, Purpose, and Results
- Think about what sequence of steps can be taken to produce every desired result
- Analyze every sequence to identify measurable activities
- Gather all the activities into an activity list
Step 2. Divide Activities into Smaller Manageable Tasks
The purpose of this step is to make activities sufficiently simple and feasible. The approach is to break down project activities into sub-activities, and then to divide each sub-activity into component tasks. These tasks can be then organized into sub-tasks and simple actions, if needed.
When all tasks are defined, they must be transformed into short-term individual goals. The main requirement here is to reach a sufficient level of detail, so that tasks and goals will be quite manageable and feasible assignments of team members.
Step 3. Set Sequence and Dependencies
Once the activities have been broken down into smaller and more manageable tasks, with sufficient detail level, your next step is to relate the activities to each other. You must determine their sequence and dependencies.
- Activity sequence means a specific order in which your activities should be undertaken
- Activity dependencies mean a series of rules that determine whether an activity is dependent upon the startup or completion of any other activity.
Here’s an example:
You want to build a house, so you must identify a number of separate yet inter-related activities of the house building project. Some of the activities can be preparing the foundations, building the walls, constructing the roof, installing the windows and doors, etc. The sequence is logical as you cannot install the windows without having built the walls. This means the sequence dictates how your project activities must be organized and arranged as to each other.
Furthermore, by setting dependencies you can identify which activity proceeds or follows other activity. Dependencies can exist between related and unrelated activities. For example, constructing the roof and paving the backyard are unrelated activities within the same sequence, but they may be undertaken by the same person who cannot do these activities at the same time. Therefore dependencies are required.
Step 4. Specifying the Timing
The 4th step of this Project Activity Schedule Template is to estimate the start-up, duration and completion of project activities. It involves developing a realistic estimate of the duration of every activity task, and then embedding this estimate into the activity schedule to establish likely commencement and completion dates.
However, there can be some troubles using this approach because sometimes time estimation is impossible with great confidence. This situation may occur for a number of reasons, including:
- Some essential activities and tasks have been omitted
- Dependencies are set improperly
- There is a desire to impress with the promise of quickness
Step 5. Define Milestones
A milestone is a special event added to the activity schedule for indicating the performance of a related task or goal. It is a progress marker with no (zero) duration and therefore no consumption of resources is associated with the milestone.
You can use milestones in your activity schedule template to keep track of task performance. They will help you to lead and manage your project team as through milestones you can set the progress targets the team must hit over a certain period. The simplest example of activity milestones are the dates estimated for completion of every activity scheduled.
Step 6. Allocate Tasks Among Team
The final step of this Project Activity Schedule Template is to decide which tasks will be assigned to which team members. You must define each team member’s accountability to the project manager and to the rest team. Task allocation therefore involves considering the abilities, skills and experience of every team member.
When you delegate tasks to your team, you must be sure they know what is required of them. If you see they do not clearly understand the tasks, you can try to increase the level of detail and break down the tasks into sub-tasks.